Showing posts with label Polygel. Show all posts

Thursday, August 13, 2020

Bright Polish, Gothic Name

 Pahlish is one of my early indie loves. 

Thankfully she's still swinging it out of the park.


Here is one of the early ones for me: Your Bright Shadow.


Set in a beautiful violet leaning periwinkle swim some seafoam and pearl white glitters of various shapes. 

Three coats, no top coat.

Pahlish, as is the indie way, only made this for a short time. You may be able to find this gem in a blog sale or perhaps in a facebook sale. Otherwise, it's page out of the nail polish history book.


Meanwhile, this is an old photo from May, so I am playing catch up and trying to post more often with photos that I think are worth posting.


Still polygel free for now.


Take care and thanks so much for reading my little nail polish journal.

Tuesday, January 28, 2020

Back to Blog + Instagram (And Polygel news)

Yes, yes, yes...I know.

Make up your mind, dear!

I have.

I again have access to my photo editing software, and so will begin paralleling the two, but mostly here with a shot on IG.

Why you ask? (Please do!) I like having control over my content. So I have a central place to place photos that I trust (Flicker/Smugmug) and I also don't have to worry if Instagram gets to onerous.

I will post soon, it's been a lazy river of a winter.


Polygel News

I have been following how they've changed technique by adding a gel base coat. I've been doing that and have not had any adhesion issue.

Additionally I am owning my filing a bit more and getting a better (certainly not perfect) shape that really makes wearing polygel a pleasure.

I also have discovered that Polygel does "dry out" or get a bit more "set up" in the tube toward the cap if you let air into it. I thought I had the little squeegee thing that comes with it up, but it wasn't so I had a gap. No worries, though, it all has worked very well. Even a little stiff.

Next time I buy, I may get translucent pink instead of clear, not sure. I don't do anything except wear it over my own nails, so no forms, no building a smile line, etc.


Wednesday, March 20, 2019

Emily de Molly Reflection

Here is a semi-green, a blue clover green that pulled extremely blue when photographed.

Pretty as can be and two coats that were super easy to use.


A scattered flame and a readiness to show holo makes this such a win. Not a huge fireball of holo, but a beautiful shade and a respectable holo showing.


Playing with my old Lumix because it can be easier to use and does a better photo than the iPhone.

I am loving my A6000 by Sony, but the quickie jpeg file is too small and so frustrating. Perhaps it's just me and the menus. eep.


Here is some polygel info, and a photo I normally would ditch, but there is a great image of polygel "snot"


Take a look at the index finger up in the left hand corner. This is a result of the slip breaking down polygel and causing it to get on your skin. It is interesting how slip (what is basically perfumed alcohol and acetone) must be balanced: too much and you get this, too little and the brush just grabs on and causes brush marks. 

This goes away after a while, but really shows that I got a bit zealous. This was my non-dominant hand applying it and control was an issue.

Meanwhile, liking the more flattened polygel enhancements and loving the much easier grow out: less obvious and easier to fill.

Filing is also mitigated because there is less of a hump.


Thanks for reading my little nail polish journal!!!

Sunday, January 20, 2019

Mining the Past: Color Club Love 'Em Leave 'Em

When I first got into nail polish I had a terrible habit of buying Color Club collections because they were so inexpensive.

I think part of it was fandom for several great bloggers and also Ross had them for super cheap.

The bloggers have moved on, Ross seems to have as well (heck even Color Club!)

Yet I still have drawers of untrieds.

Here is one from a 2009 or 2010 Color Club Wild at Heart collection called Love 'Em Leave 'Em:


I topped it with a virtually invisible Revlon Glimmer Gloss Banana Blaze.

I couldn't catch any glass fleck pops, nor did I really get a handle on the very subtle holo flame.

I call this scattered, but it does produce a faint warm red/orange flame that is a delight.

I think in order to emulate the current indie trend of multiple layers of depth, I'd have to layer it (It's two coats, pretty dense, so not really a good direction) or add a lot more Glimmer Gloss.


Many people call this a nude, it definitely is a golden nude. I will be moving this over to my stamping polishes because it covers very well.


Polygel Notes

I'm adding this section to just pass along things I learn.

A few things in this post.

Thickness
I notice that thickness is an issue. Since this photo, I've been filing with a coarse file (not labeled, but pretty coarse, 150? Who knows I know only from sanding my deck!) It removes a lot of bulk and helps them be less "bubble" shaped.

Lifting
In the past I didn't have much lifting, but now that I am polishing my nails more, I do get it between fills. Historically I found that it never produced a problem, but about two weeks ago, I had a lot, so I soaked and removed Polygel from 5 nails (different hands) and reapplied it. It took forever. For. EVAH! I mean after 3-4 solid hours, I had to slap on a nude and just deal with reapplication the following day. I so wanted an electric drill!

Reapplied and though I have a touch of lifting, I am not seeing as much. I will play around with some super glue, though, or something that can just prevent moisture from getting under the nail.

That brings me to...

Brown Spots
Prior to Thanksgiving, I had found that the natural nail under the Polygel that was on my pinky had somehow came undone. It was firm against the nail because it was past my nail bed, so in the 1/3 inch that extended past my bed - free edge -  the nail could be pulled away and would snap back.

I thought nothing of this, but a few days later the nail was in need of replacement, and somehow was tender. I removed the Polygel and found these light brown spots that caused divits in the nail bed. I discovered it was a bacteria making a home. Yikes.

Cleaned it up, filed it down, and haven't had a problem since. This is why if I have lifting, I file/soak it off. No easy access parties for the bacteria!

That's all for now, I like the more flat profile, I think it looks better than the old ones (above), but it's still a learning curve for shaping and filing. 

Thanks for reading my nail polish journal!

Thursday, September 13, 2018

Milani 3D Holographic

I think these came out in late 2009 or early 2010.

There are six polishes in this sweet little scattered holographic collection. A few months ago I did swatch one of them and though, DANG! I need to do the rest!!


Here we go! (No top coats, btw!)


Milani 3D 510


Two coats of Solid Gold Dancer loveliness.

A combination of lamp and flash brings out the sparkle and some scant holographic.

If you love gold, and I confess I do, this one is a treat.


Milani Cyberspace 512


Beautiful watery aqua blue. Love the coverage but was three coats this time. No worries. The payoff is beautiful.

Perhaps my favorite!


Milani Hi-Res 514


Plum purple that pulls warmer on my nails.

Three necessary coats, but the job was done. Nice!


Milani HD 513


Three coats and just divine. This is under lamp and flash, but at an angle to really pick up the holo.

I love this one so much.

Unlike the rest, this seems to have large holo and some smaller holo, so it has a little bit more of a flash.


Milani Hi-Tech 511


This delightful peridot is a three coater and shot with a flash, strong flash.

I love it and it was such a nice one to wear.


Milani Digital 513


Three coats, but really a bit more sheer than I'd have liked.

This pink coral warmed up on my fingers, but didn't disappoint in the soft scattered flash department.


I tried it as a topper over Sally Hansen Sultry Fuchsia


Sultry Fuchsia is a bit deeper and ranges more into the berry shade, but you can see the base in the Milani is sheer and virtually vanishes and the holo particles just scatter around and behave like a holo topper.


There you have it, a set of very well considered holos.

These are available on eBay and Big South American River, and fairly affordable.

They were the beginnings of holo after a hiatus and so everyone was excited.

For my part I'd say I love some more than others, but they all do a nice job for scatters.


Wanted to add a side note: during the summer my nails grew very long and I was so happy that a lot of the damage from Polygel had grown out.

Sadly I had a big break, and discovered that at their longest (back in the CbL Marilyn post) they were too weak to support the length and were subject to flipping backwards (the nails-on-a-chalkboard feeling for me).

I then discovered a smile crack that ran through the lower 1/3rd of my middle finger, so I knew I bent something forward, but I also didn't realize I'd cracked the nail in the bed so far down. Yikes.

Where am I going? Well, last night I reapplied the Polygel. Muscle memory kicked in and it wasn't super hard to apply, even with my non-dominant hand.

The support is just something I will use for a while and it does make things more 'firm' in my nail, so it's less mobile.

Next steps of course: work on filing, work on less thickness, and work on maintaining a length that feels good.

Thanks for reading my little nail polish journal!

Friday, March 9, 2018

Late Winters

The flip flop of warm January and cold February has leaked into March and everyone is keen for even the remotest nice day.

It's how we roll.

Everyone forgets that the epic snow years may just be behind us. 


Here's a green that does not ignite the way I'd hoped

Zoya Irene


A semi-sheer green with earthy undertones. You can see how ravaged my nails are from Polygel. My enthusiastic filing to scrap away the smooth layer meant that I created horizontal divots. 

I believe that the initial weakness and bubbling of polish was due to the stored up moisture in my nails in the nail bed. I can see how enhancements are a home for fungii. First off, fungus spores are out there in epic proportions, so even super clean places can have them floating in the air. Secondly, dark and damp is their home town. 

Onward.

I won't say I love this polish, but I won't say that it adds a lot of to my collection.


I didn't want to say no until I tried it as a layering polish over navy blue.


This does help, but honestly, it's more of the navy popping through that wins the day for me.

A pretty shimmer with some reddish warmth in the bottle that just doesn't seem to make it to the nail. 


Thanks for reading my little nail polish journal!!

:D

Thursday, March 1, 2018

As Events Turned Out...

Where to begin.

Reaching back to put my hood over my head in the snowiest late winter day I've seen in a long time, I bent my nail.

Nothing bloody, just awful feeling.

Over the next week I began removing Polygel.

So here's the thing: between my filing and polygel contracting as it's dried, my nails are really in super bad shape. When it contracted it cracked my nails and bent them in ways they never grow. For example: a nail would have a strong C curve looking at it from the front, but the tip itself would curl upward. Cracks in the infrastructure are just not pretty.

Super not fun.

The one nails that had the bend is just not pretty, but I can see file lines, it's not pretty.

And, seemingly hard to understand, because the nail is now more thin, moisture seems to get through the nail and cause virtually every single polish I put on to bubble.

So be warned. Things are uneven and bubbly. It's going to be a long few months.


Greens for March is my favorite, so I want to carry on a bit.

Here is Azature Eucalyptus Diamond.


First off, two coats and no top coat.
A glorious, luminescent olive green. 

I found the formula a bit brushstroke-y and somewhat thick, which is better than too thin. I did have some spill into the cuticles, but not much.

My biggest complaint: the brush!!! It was a scraggly mess. At least 3-5 hairs sticking out left right and center. Plus the brush wasn't laying smoothly, it was thick and bunchy at the bottom. 

I can't understand why a brand that tries to be in the luxury realm would have such a nasty brush. 

I bought mine in 2015, on sale for $6 a bottle. Normally they are $25 (!). I think if you follow the sight through email or social media you will find deals.
Personally I have enjoyed the colors I chose, but I seem to find the nouveau riche aesthetic and the phony "black diamond" nonsense just far too much marketing and huzzah. (black diamonds? Seriously? That's a dirty diamond basically you get the strength but zero fire. Yes it has its place in jewelry, but let's not toy with why people love diamonds: the fire)

Ok. Back on track.

I am loving this color, but for now I am backburnering (is that a word?) them for any purchases.

I'll talk more about my post-polygel nails in my next post.

Sigh.

So bummed.

Thanks for reading my little nail journal!
:) 

Sunday, December 17, 2017

Seche Buttoned Up and Some PolyGel Chat

Very unseasonal manicure, but a color I really couldn't help but reach for!

Seche Buttoned Up 


Here is a polish that does three things very well:
1) it has contrasting shimmer that doesn't get buried
2) it has a gorgeous formula (no clean up despite my best efforts to slip slop it around!
3) it shines without a top coat

It has a real changeling feel about it. It looks periwinkle in the bottle, but then it looks very lavender. The blue shimmer just works its little buns off.

I adore this polish!


I wore it for several days and didn't give me any real issues save a bit of tip wear, which is normal for me, since I seem to type with the tips of my nails. I also wore a normal top coat, an old Milani double duty. I will just say, as I've said before, top coats aren't a big thing for me because I change my nails a lot, but I've been well served by drugstore brands.


A gander at the Seche site and I see that they have dumped their round bottles and gone with a modified hourglass shape and co-opted the new "system" thing that a number of brands are espousing.

Not tried the system, and it appears they are at Sally Beauty, too. 

Ok, but here's the thing: if you want to try this brand and are planning a bigger order, check out Head2Toe Beauty: they have the old bottles (this one is from the Perfectly Poised collection) and a ton of beautiful colors. 
Old price: $3
New price: $4.95

Hmmm.


Well, they are a salon brand and that's a normal evolution in what must be a super competitive market.

Meanwhile, there's always eBay (and there are a lot, including this one, listed)


I did try some stamping:


This is from a forgotten plate and I also need to realize that my nails are bigger and longer, so fitting patterns on is different. I have assiduously collected small patterns. The news flash is that I just need to flex some of my bigger patterns that I still have.

The color, against this Color Club Nail Art blue really goes soft pink/lavender. I had to triple check my notes to make sure that I was getting the right photo. It really changes in comparison to a strong blue.

I highly suggest picking up some Seche polish. I am always pleased with it.


I wanted to show some behind the scenes with my nails.

Here is a shot of the back and sort of a look at the "sandwich".


So you can see that I layer it over my natural nails and while shaping is still an issue, I like that my nails is there, too.

The way it looks from the front, or the longitudinal side shows how my nails have a bit of a wonky shape, but I try to balance the shape I get out of the PolyGel though it sometimes can be thick.

I was watching some videos of application and they have it very thin, compared to mine, so I might experiment with thinning it down. Though I have no issues with the thickness, I can see when I begin to layer it can get rather "chiclet" ish.

I usually spend the first night doing the fill, then a quick manicure. Then the second manicure I do add a lot of shaping and filing because the filing isn't just around the edges its over the top, along the side wall, and creating that arch shape.


I will post some application photos down the pike. 

Right now I use clear - it came in the pack I got - and I will say that I think it is fine for me, especially as my yellow nails grow out and I can really use sheer stuff and enjoy.

Thanks for reading my little nail polish journal!!!

Tuesday, November 14, 2017

A Little Purple There, A Little Purple Here...

I have some things that are in dire need of swatching, but I've been wanting to tone up the old Polygel game before I went full bore.

Getting there, and thought, I better start somewhere!

First up is Zoya Mira


Mira is a rich plum purple. Not really a red purple, but has those roots, but still, a purple nonetheless.

Three coats. 

I got this on Zoya's big annual sale (that they seem to be doing much more often), which puts Zoya cheaper than most drugstore polishes these days.

A gorgeous creme, faultless application, though I didn't wear it out to see how it wore, traditionally Zoya is not a strong wearing polish. I use a normal top coat. To clarify, when I say not strong wearing, while it doesn't chip - as it seemed to do a lot when I first started wearing it - it does rub off more easily.

Still I love this shade. Gorgeous.


Zoya Serenity


Dreamy, smokey, and luscious. If you like purple, you will like this one.
It's dowsed, but not crushed into a neutral.

So great.

Typical three coats. I won't lie, this one moved to the head of the class for me.


Color Club Pucci-licious


Blogged a million years ago, here.

A classic, bright, clear, and neon-esque (I think it's hard to get this shade into a real neon)

I've had this bottle forever, but I love it a lot. I think I had a backup that I moved on down the road.

This is topcoated, as it it will dry more matte.


Here's a comparison:


Left to right:
Zoya Mira
Zoya Serenity
Color Club Pucci-licious.

I love all three. They are not alike, although in a pinch you can do Serendipity versus Pucci-licious and be perfectly fine.

All three have been topcoated. I always have mixed feelings about doing it, but most of the time I wear a topcoat, so here I thought it more natural.


Mira and Serenity are still available on Zoya's site as is Pucci-licious.

Quick note about polygel: I am loving the strength of it and learning to be a better "filer" and making the shape the best I can do, but I notice as soon as I put the polish on I notice some sort of oddball shape issue, or curve or edge. It's almost like 3-D filing.
My hope is to do a post with application, but I want some more practice under my belt before I go there. In the meantime, I love the results, the low cost, and the ease of use.

Thanks for reading my little nail polish journal!

p.s. all photos are taken with my iPhone. I think they are pretty accurate, but perhaps they pull a little blue. 

Tuesday, September 19, 2017

A Month Later....

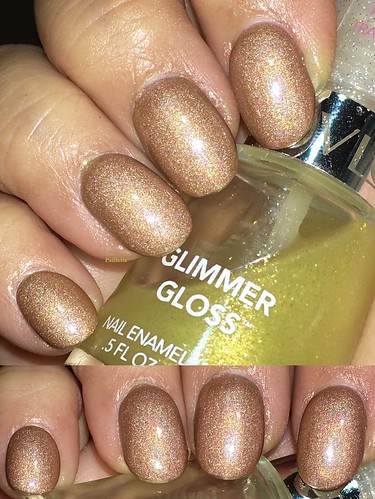
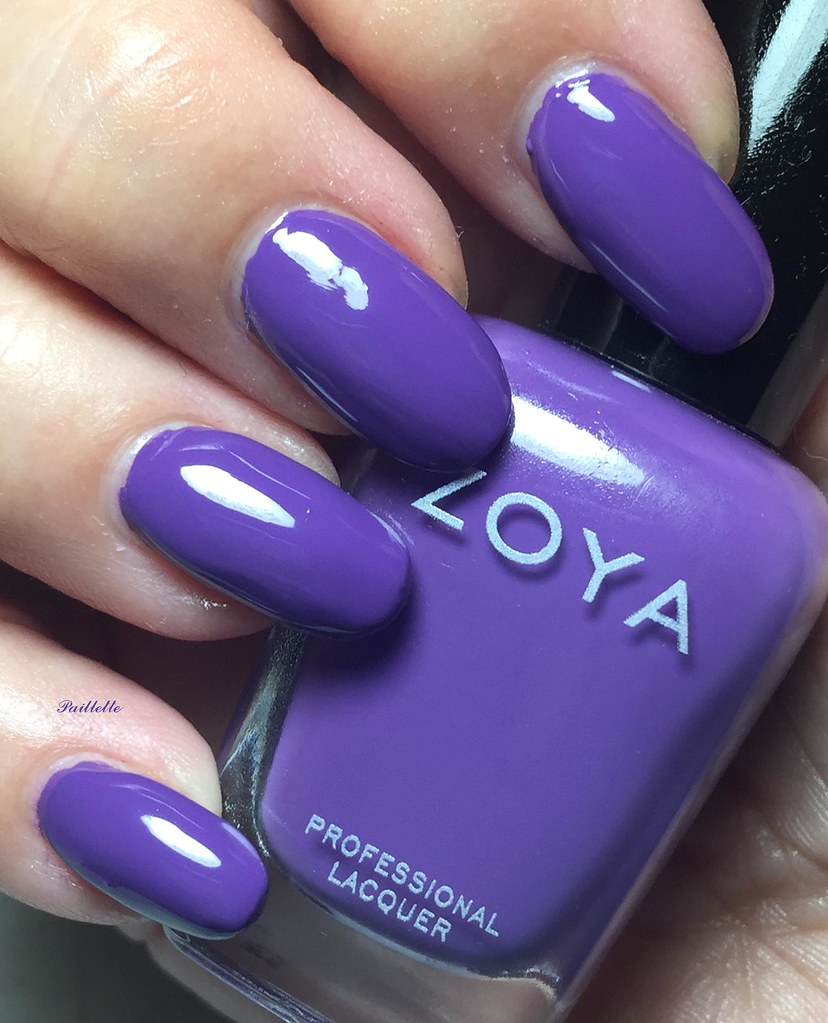
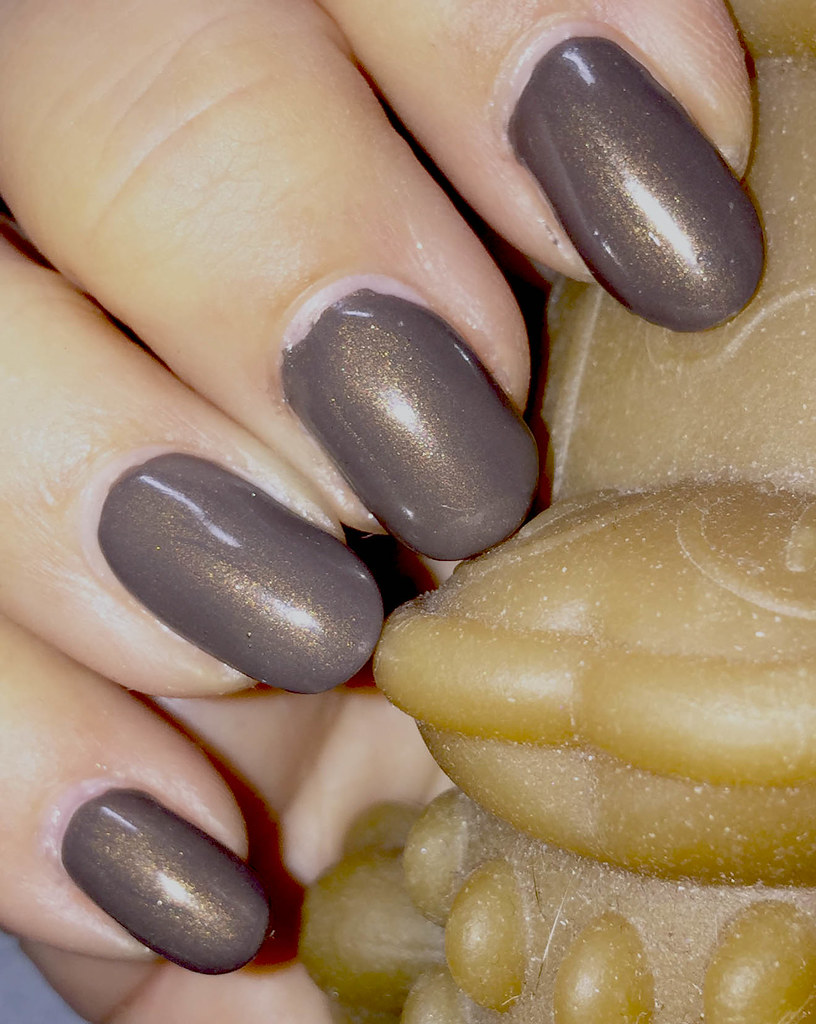
Here is my first post with polygel on my nails. I wanted to swatch an old favorite, Maybelline Tassled Taupe. It's a great formula and has a lovely shimmer.

If you haven't heard the hoopla, google Gelish Polygel and you will get both industry information and a lot of Youtube videos.

Having had issues with my nails just getting long and then needing to be wacked off because of a crack or a break, I've tried every nail strengthener, but nothing really can protect my nails from the beating they take. I had looked into acrylics, but the application process is far too invasive: too much filing down of my nail. I did want some gel stuff, but soaking off polish felt like a super drag. I haven't done acrylic dip, but since I change my polish a lot and with acetone, the videos didn't seem promising. I tried some non-acetone remover and it was just so awful. Ugh. 

So, I gave up.

When I heard about Polygel by Gelish, I thought, it's cheap enough to get into, they make it look so easy and they really seem to have a system that is workable until cured. Ok.

Went to Nail Tech Supply (awesome) and picked up a trial box ($70 by the time shipping was done). and promptly procrastinated for three weeks.

Then I just jumped in. Closely following instructions. Using my eBay/Amazon procured supporting products and an ELF brush, I applied it.

The slip really smells awful, but I guess if you work in a salon with acrylics it must smell nice, because all the youtubers sniffed it and pronounced it nice.

It's been a solid month and I am on a fill and some days out I think I am only still just getting around the filing side of things. It's still a work in progress, for sure.
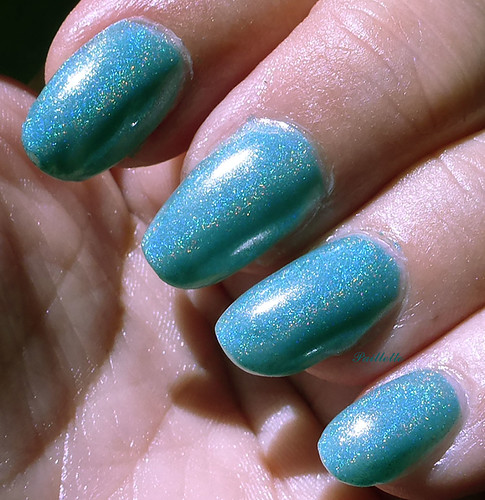
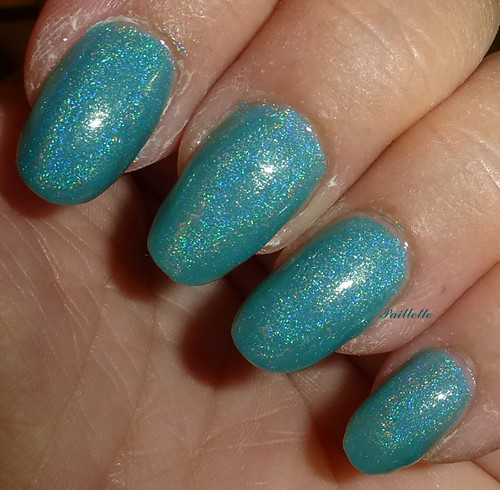
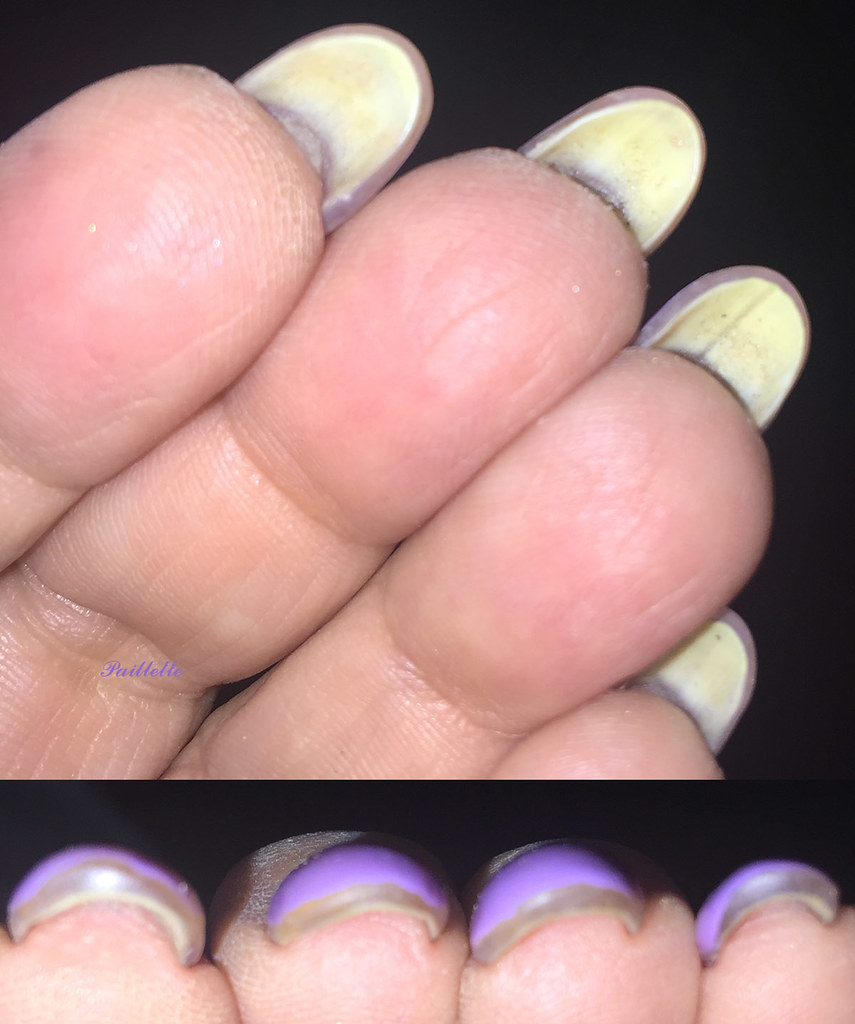
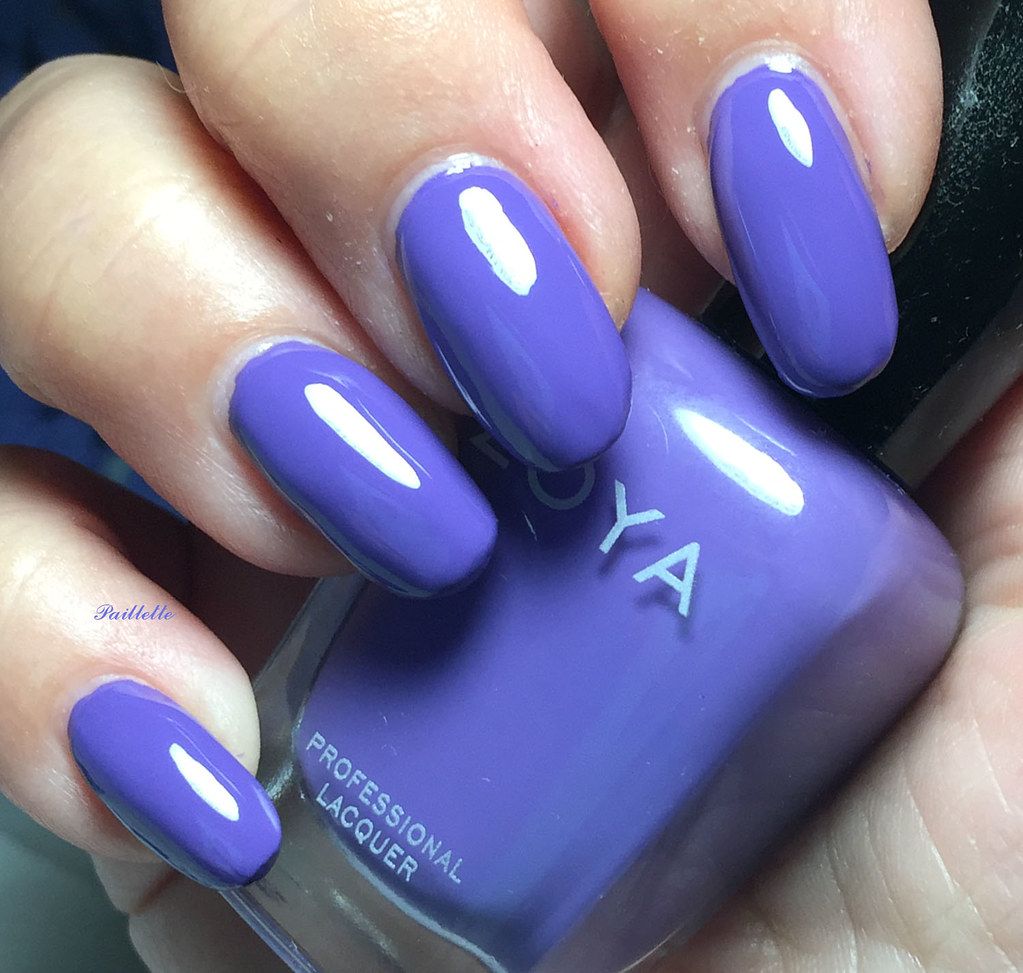
The result:


Don't get me wrong, I'm not crowing about the result, but this is the first time I've looked at my nails and they are starting to get there. While far from salon perfect, it's a huge step forward and the first time I wanted to photograph my nails since applying this stuff.

The thing to remember that beneath the Polygel are my nails. Period. There are no extensions, nothing. I look at these as support. Even though I see videos of people doing forms and things, I just don't see that as a thing right now, if ever. I really just like not having to worry about breaks as much.

But of course, there are new worries and learning curves. 

I did have some lifting after the first application. I use a crystal file and a higher grit no-number one I got with a bottle of harmony bonder. So I watched a youtube video and saw how to get rid of the lifted section and reapply. That was at week three, and the only hinky part was just seeing the lift.

Because you use a slip to keep your brush from sticking, you need to use it with tact: it will dissolve the Polygel and it will get all over your skin. Of course using my non-dominant hand has been a flexing of nerves and muscles that just didn't have to think quite so hard, but it's just like painting my nails, but not. It really doesn't move like they say, and you can manipulate it, though I have no acrylic application experience, I did try to make it super thin and that might have been an issue.

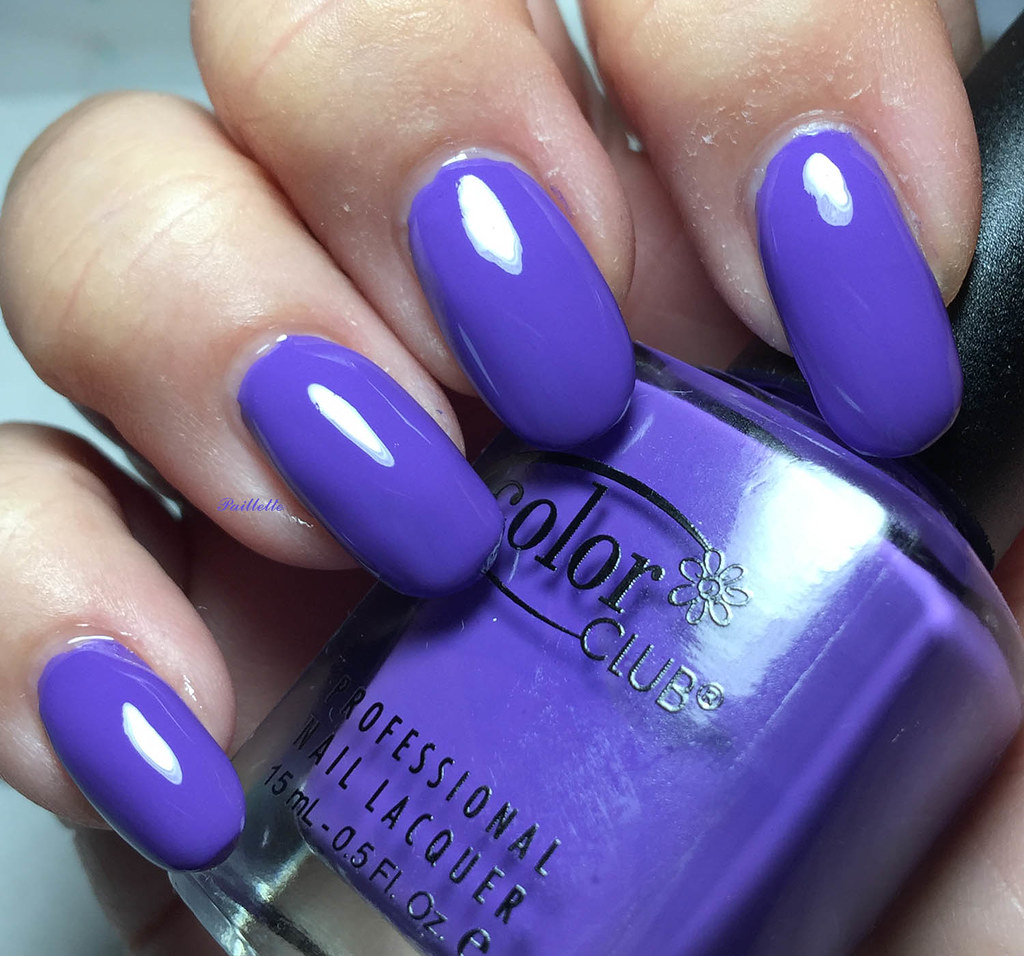
So every time I change my polish, I tweak the filing, smooth things out, etc. 

The goal is to have uniform nails that can stand up to some light abuse. They don't need to be long, but I would like to eventually get a length and shape that works for me a little better for swatching.

I will post more about this, but my goal is to continue to swatch and work the side of the street I enjoy. 

Polygel is very strong. Well, I guess that is relative, no? I do know that I jammed my thumb into the roof of the car moving something and that would have been an automatic break, so nice!

I will probably find another brush, I'm using an ELF smudge brush found at Big Lots!, so it's not a total win. Next will be my ELF concealer, a more precise brush. If I need a better brush, I am sure there is a video that will cover it.


Thanks for reading my little nail polish journal!