Showing posts with label Water Marbling. Show all posts

Wednesday, November 25, 2015

Turkey Gravy and Cranberry Dressing

Happy Thanksgiving!

I want to thank all the people who follow this blog, make comments or email me. Thank you so much. I really enjoy doing this and appreciate you folks a lot.

I've got plenty to be thankful for...to quote Irving Berlin.


Here are a couple of polishes that share one topper, thought I'd see how this turned out.


Sally Hansen New Lengths Metro Creme


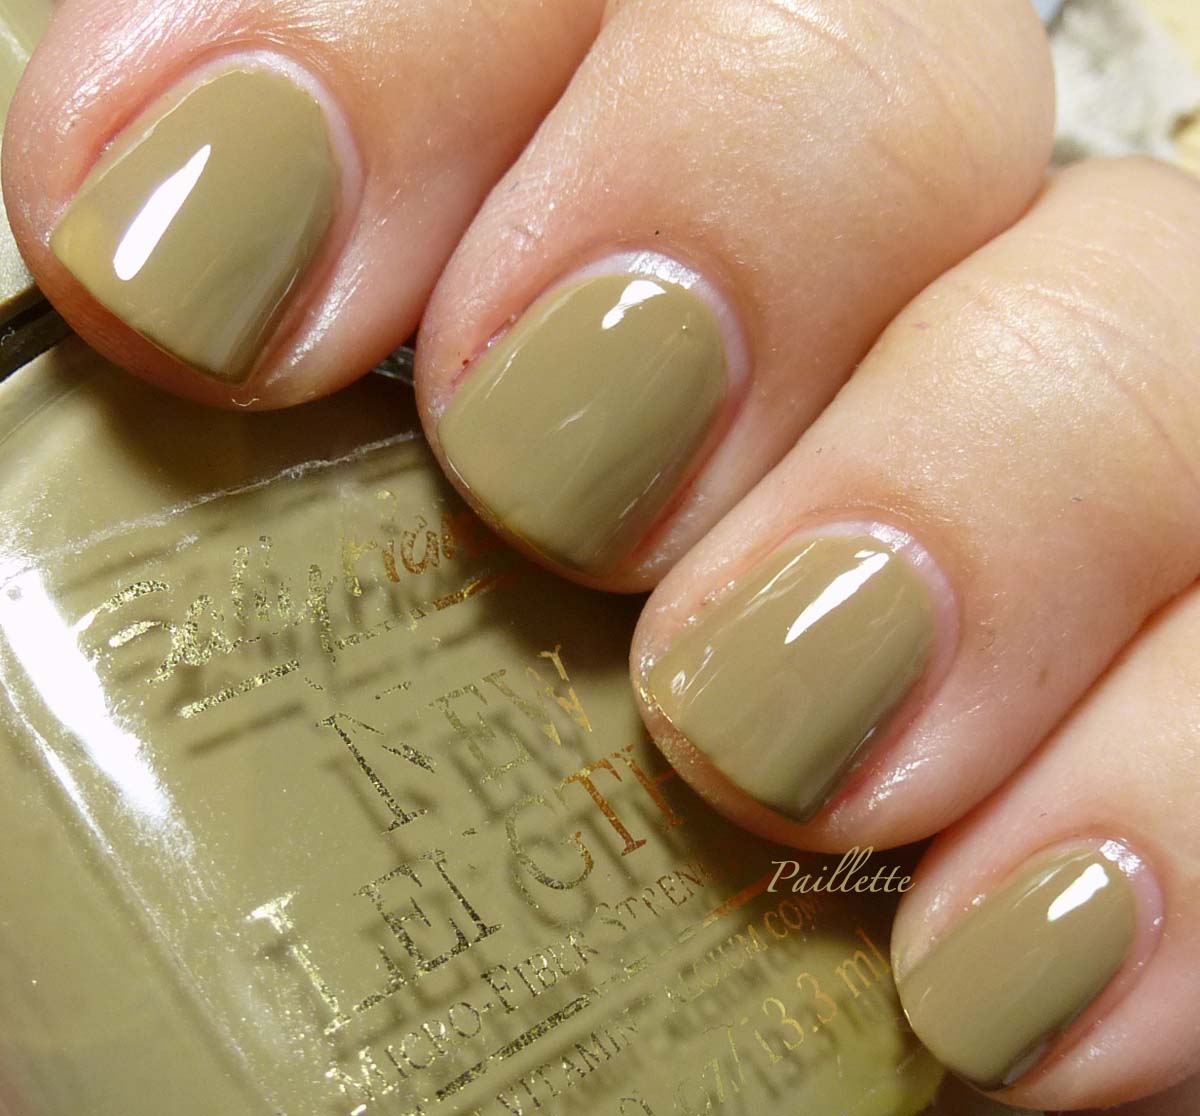
Kind of a turkey gravy shade, perhaps also an Army khaki. In any event three coats and still a touch on the sheer side.

I found this at the Dollar Tree back in "the day" when a huge bunch of these New Length and Hard As Nails and Nylon polishes were all showing up.

I can't say it's a super fave, but it's unique. Just need to add some giblets (I hate giblets, but who doesn't think of the word giblets and giggle just a little?)

I did add SinfulColors All About You


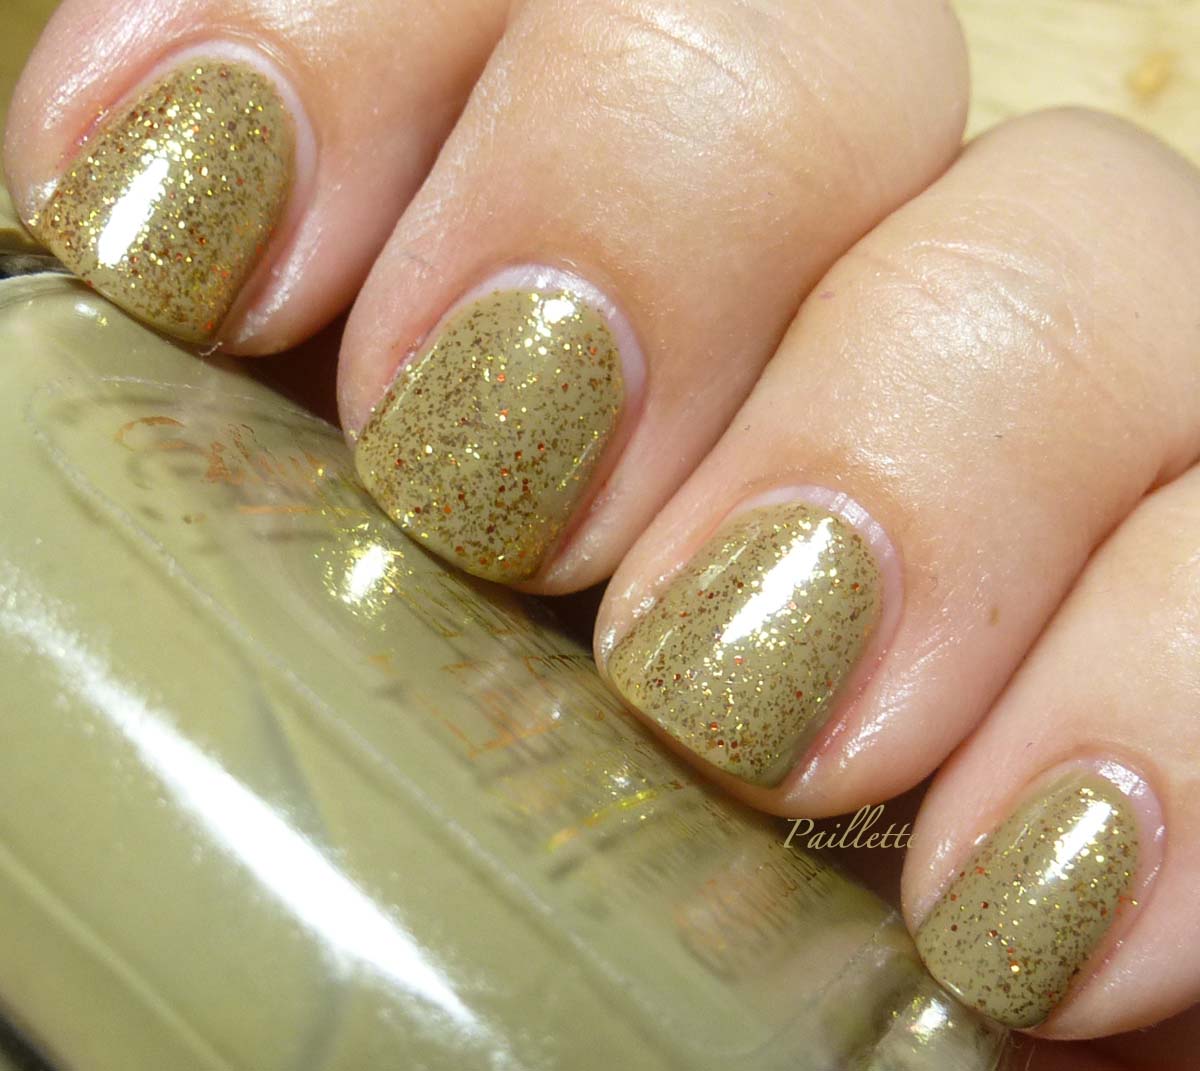
This is two coats of SC All About You.

I blogged it here, and it's a pretty little glass fleck number that just is so darn cute!

I think it improves this polish, and as an "on the go" polish All About you yields a good result.


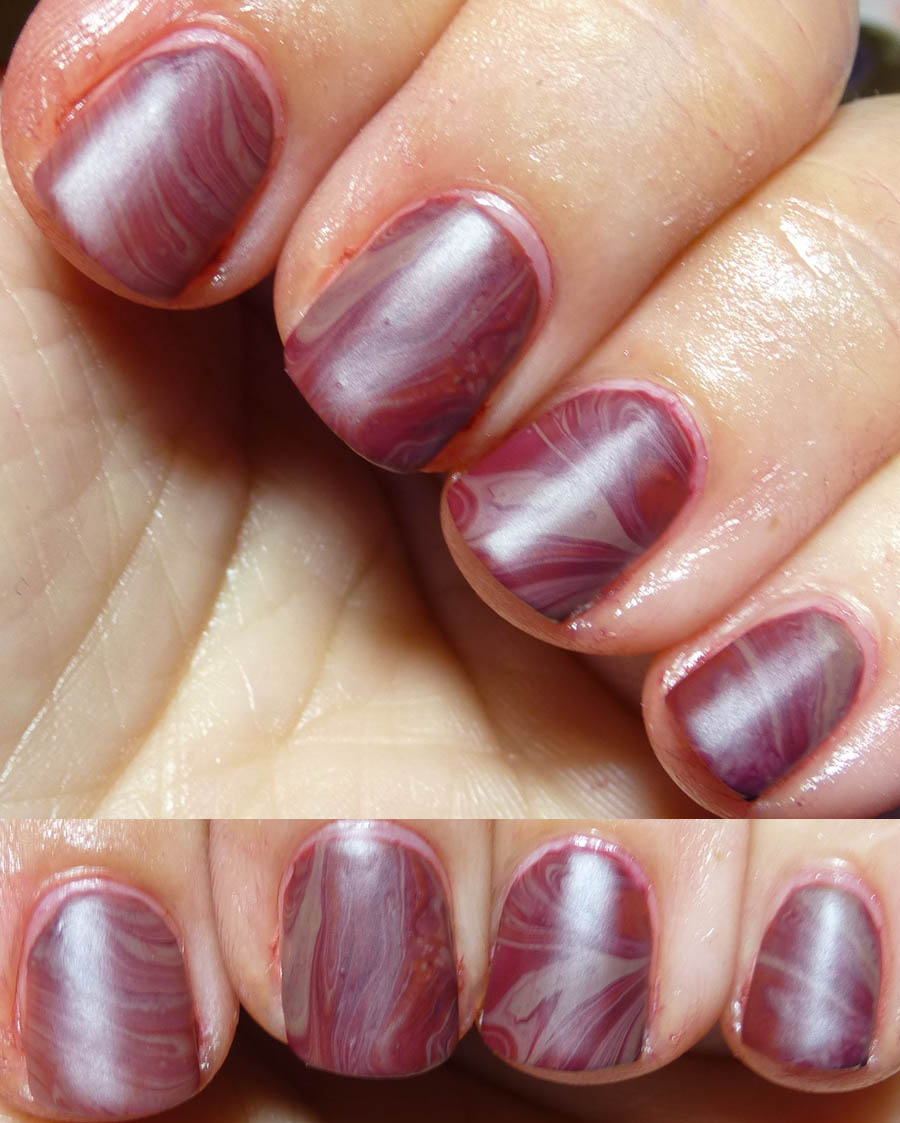
Sally Hansen New Lengths Rich Plum Creme


I don't get plum, but I sure get cranberries! My favorite part of the meal!

Three coats, and a beautifully rich shade that stand alone.

But I did add some SC All About You


Robust, indeedy!

Two coats of SC, and it's much warmer.

Love it? Not sure, but I do think it's time for a second piece of pumpkin pie, any way you want to cut it!

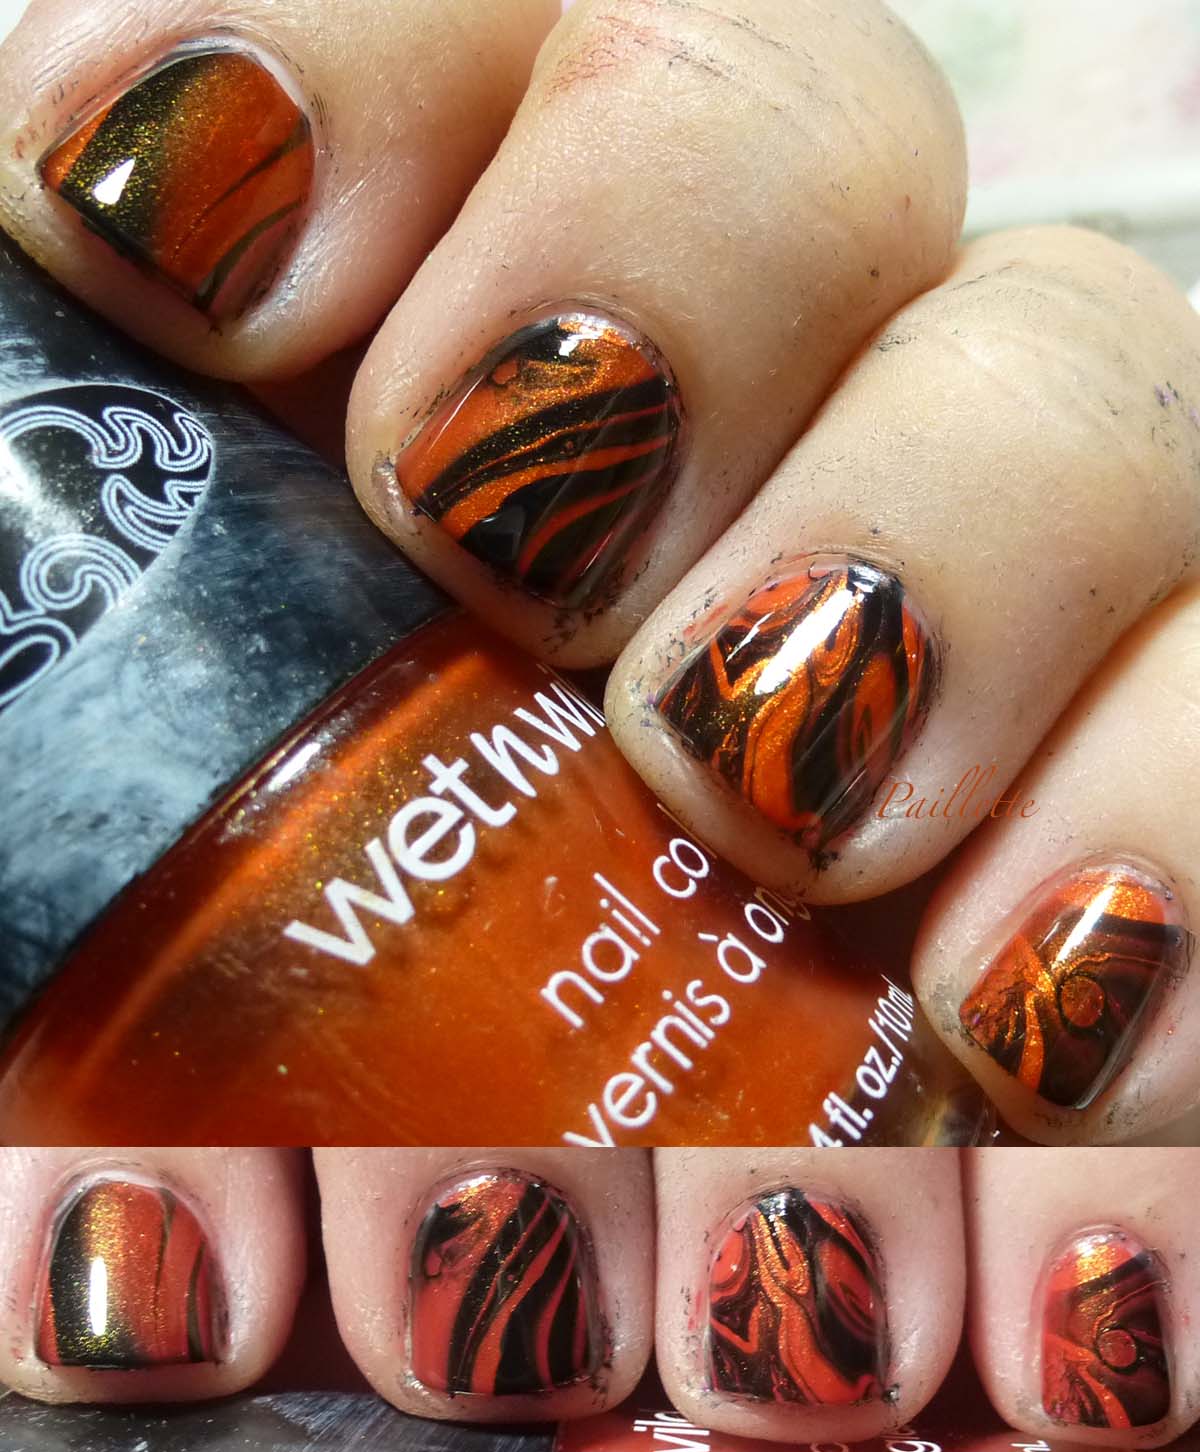
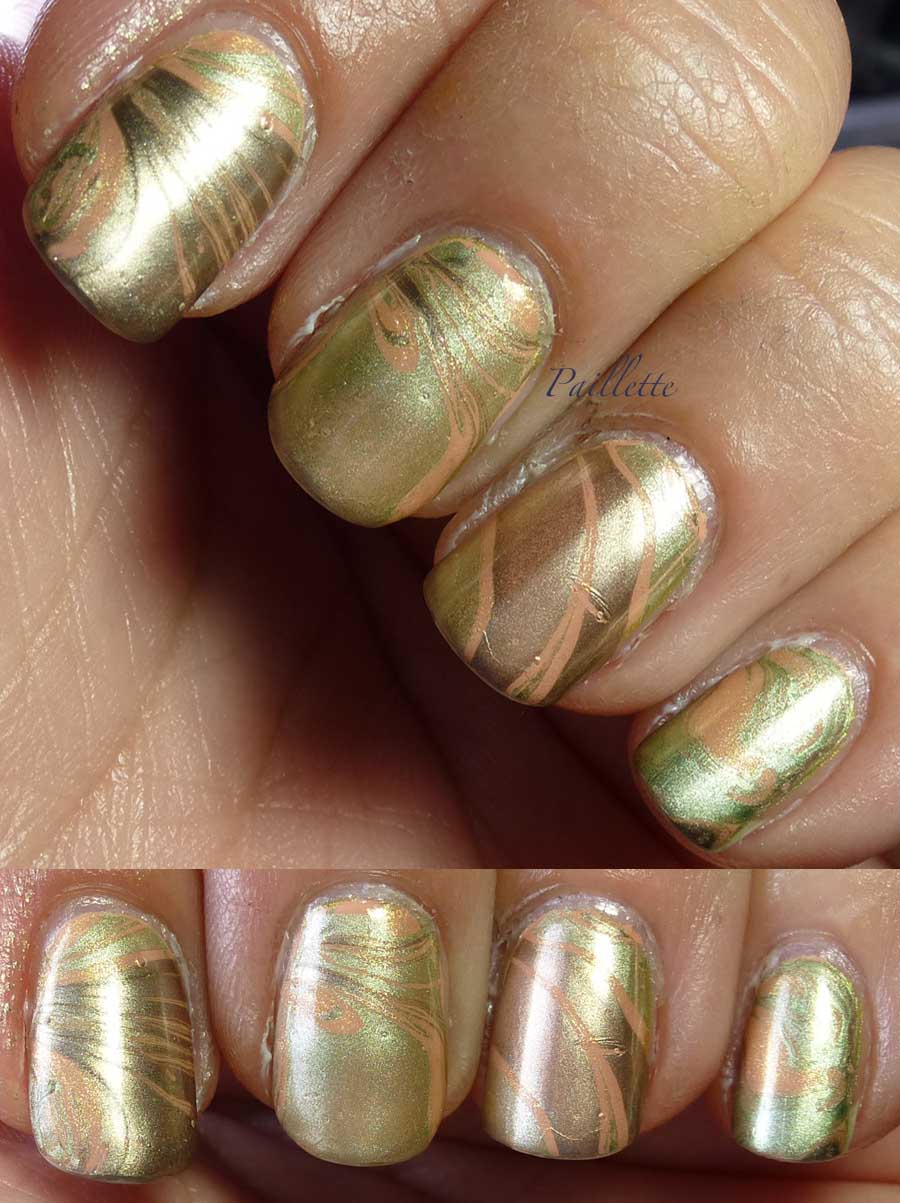
I wanted to add a water marble I did with similar colors:


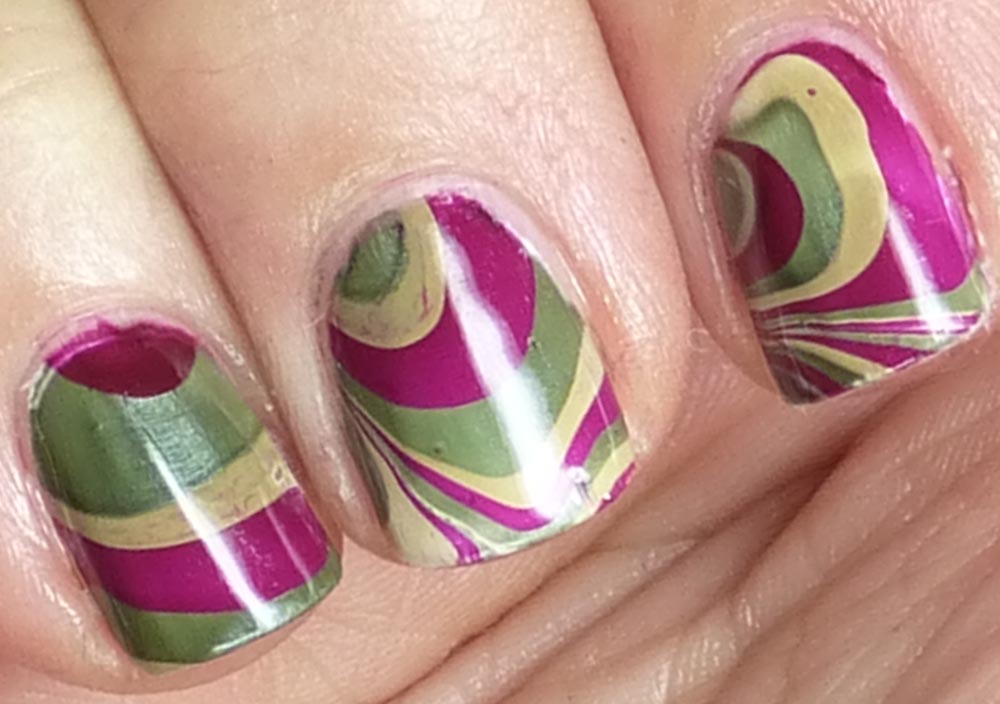
It's a "gravy" tan (SH Snappy Creme) and an old SH vamp, whose name I forgot (label off), and Max Factor Momentum Moss.

Sort of a gravy, cranberry, and peas thing going on. I guess I'm hungry for some turkey!


Thanks so much for reading my little nail polish journal! Truly!

Monday, October 26, 2015

Ghoulish Water Marbling

Here are a pair of water marbles that are just right for the season!

First off, I've picked up some latex body paint on Amazoid and put a bit into an empty striping polish container. It's pretty much life changing - when I use it right! I'll discuss it a bit more with each photo.


WetnWild Inferno and Borghese black


I love the color combination.

I had WnW Inferno as a base coat, which means that it supports the orange in the water marble, because over a black base it would be far to sheer.

Now, you can see that I dipped my fingers deep into the  water marbling jar and got it all over. When I used the latex paint I painted closely around the nail, leaving a bit of the edge, an down to the first knuckle...well, you can see I passed the knuckle.

It has to be said that nail polish remover isn't a complete panacea for removing pigment once it gets into the cracks of your skin.


Sally Hansen Snappy Creme and Leather Creme


Totally brings out the yellow in Snappy Creme. I think it looks a bit like decaying flesh, but I'm not much into zombies and such. Though it does have that melting face thing, which I do like.
I guess I still go out to the barn by myself and think I'm in World War Z or something and once I turn on the barn lights I'll see a herd of zombies in the barn aisle.
RUN!
(unless they don't like horse pooh, in which case I'm safe if I hide in the muck heap.)


This time around I pretty much covered myself down to the second knuckle and did not get it all over me. Still, I had leftover black and orange on my hands.

My experience with the latex body paint was successful, inasmuch as I learned that it's really helpful when I apply enough to cover my fingers.
Nice!

Thanks for reading my little nail journal!

Friday, November 7, 2014

Meat Marble

I wanted a rich "cozy Victorian library in a Georgian manse" feeling and instead I got meat.

Well, you'll see....


Instead of leather bound books, a crackling fireplace, and a glass of dry sherry, I get a really creepy look.

It's like decaying flesh.

Like the cadaver lab at a medical school. 

I think mattifying it, which I ended up doing here, made it less like "body found by the wetland behind the hunting lodge" and more presentable.

I didn't keep it on long after I photographed it. I'd only done 4 fingers and trying to water marble more of this monstrosity was too daunting. Remember, I hold the banner for craft challenged and the payoff wasn't twinkling my bell.

Here are the polishes I used:


I think a yellow or a yellow green would have smartened it all up.

This ended up more like a Murder Mystery Weekend on the Golden Girls (tell me you've seen that episode, right?)

Thanks for reading my little nail polish journal!


Friday, April 4, 2014

Second Attempt at Water Marbling

I have to admit I really enjoy water marbling.

I'm still really not anything like and expert, but I think I represent that group of people who are trying and find it a challenge, yet still try to do it. I am holding a banner for the "crafty challenged who love to craft."

My learning curve, you could say is both long and steep.
;D

Here's the latest attempt:


This is a combination of a decanted Nic's Stick - whose name I've forgotten - and Sally Hansen's Salon Manicure Plum It, in the old square bottle.

Rugged would be a fair description.

I've put it over white, so that explains the white coming through hear and there.

Still no real control over the shapes I create, nor much over position.

I have, however, made great advancement in pre-taping my nails! Man, talk about a huge difference!
Things went fairly fast after taping it up, which really made the result a lot more enjoyable.

I wore it to work and people seemed to enjoy looking at them, even though they are pretty rough around the edges.

Take heart beginner water marblers, if I can do it, you can, too!

Thanks for reading my little nail polish journal!

Wednesday, October 23, 2013

Dabbling in Marbling

My favorite type of nail art is water marbling. I really think it looks amazing.

I've been practicing - it's not as easy as the masters make it look I assure you - and I feel I finally have one I can blog about. Plus discuss it as a newbie.

That white stuff in my cuticles is hand cream...eep!

The base is American Apparel Palm Springs. An extremely unforgiving shade on my skin tone. I actually did two separate manicures on two separate occasions with that polish - the formula is really nice - and then decided to water marble over the second manicure.

Palm Spings - a warm, dusty peach - lent itself easily to the other polishes in the array.
I used: unnamed Markwin gold (transparent, so basically only visible along the edges here and there), Borghese Lime, and an Essence bronze magnetic polish I recently blogged about here.

I found that the Essence did dry so fast that it was a quick drop, swirl with the toothpick and dunk into the water. I had none of that lounge-y time to take my toothpick and make a bunch of shapes.
Not to self: quick drying polishes aren't such a win.

Ok, I admit that I love these shades together. These remind me a Victorian garden room. Or, I will go out on a limb here and reference a movie that everyone should see: Fanny and Alexander. It should be noted that in that dark, cold, northern clime of Sweden, the art direction in that film made it all very warm, using little blue at all. Quite beautiful.

Back to water marbling.


Tape is a necessity. The more the merrier. I still have polish down to the second knuckle of my thumb because I relaxed a wee bit too deep into the water...yoiks.

I suggest a shallow dish. I cut down a plastic bottle and in retrospect I should have gone wider and more shallow.
The actual techniques that the Marbling Divas illustrate actually does work: blow on the top layer, use a toothpick to pull the excess out of the water and don't rush.

I did ding mine once, as you can see, and I did "double dip" (not cleaning off the top layer and then pulling my nail out)

Clean up brush helped a lot. For the bigger areas of real estate, I swabbed my fingers with acetone then rubbed it off on a tissue. Tape. Much more tape.

Really enjoyed this imperfect attempt.

To avoid water bubbles, which I've gotten in the past, I found a slow descent into the water helped, versus a jab into the water with your hand.

I tip my hat to those designers who can centralize hearts, four leaf clovers and stripes. I was pretty glad to get the design on the nail.

My goal is to do more stamping and marbling. Practice, practice, PRACTICE!

Thanks for reading my little nail polish journal!